


Scenes are a standout amongst the most troublesome subjects in nature photography. It’s generally hard choosing what to incorporate and what to forget. Also, its not simple deciphering a tremendous three dimensional space into a two dimensional photograph.
That being said, whenever you’re experiencing difficulty forming a scene photo, consider these three components:
Forefront
The occupation of the frontal area is to lead the viewer’s eyes out of spotlight. This aides add a considerable measure of profundity to the picture, which makes the two dimensional photograph look more like its three dimensional.
The forefront doesn’t need to be especially stunning (the length of the foundation is)–just pick something that complexities well with the foundation. Any items with heading lines that point towards the foundation certainly help as well.
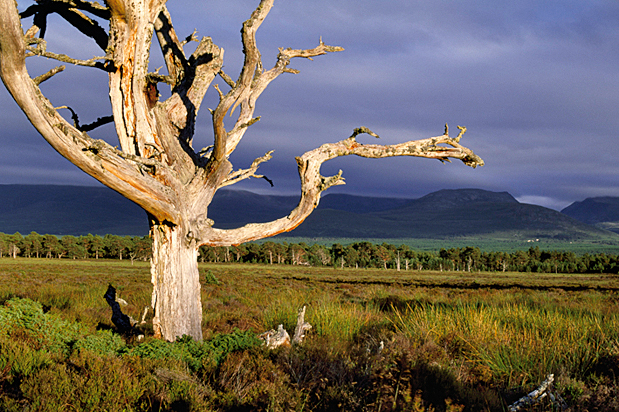
In the event that there are any extensive or remarkable questions in the frontal area, (for example, blossoms, enormous rocks, trees, and so forth), then it may help to either place them in the middle of the casing and have them grow the whole width of the edge, or put them unbalanced (after the tenet of thirds). The photograph above would have looked exceptionally strange if every one of those extensive shakes in the frontal area were in an enormous heap in the inside of the picture, as opposed to being headed toward the sides.

Foundation
More often than not, the foundation is the most sensational piece of a scene photo, on the grounds that its what the closer view paves the way to. Thus, when the viewer’s eyes get there, its pleasant to have something compelling to take a gander at.
Exemplary foundations incorporate things like mountains, slopes, solitary trees, lakes, or incredible enormous skies with fascinating cloud creations (particularly at day break or nightfall).
One basic approach to make the foundation stronger is to photo the scene under solid light, which is an alternate component of an incredible scene 🙂
Solid light
On the off chance that there’s one thing that can truly add a ton of effect to your scene pictures, then its solid light. By that, I mean pretty much any lighting conditions that deliver soaked shade or solid differentiation.
One approach to get more immersed shade is to photo your scenes amid dawn or dusk. These are known as the “brilliant hours” on the grounds that they create a delicately diffused light that brings about colors that “pop” with immersion (the photograph above was shot at day break). Additionally, remember that the day break ordinarily throws a cooler (blue tinted) light, and the nightfall dependably throws a warm (red tinted) light.
By and large, the mid-day sun creates all the more level looking shades.
In any case, the mid-day sun shouldn’t be dodged totally. Actually, Ansel Adams made some of his most compelling pictures under the mid-day sun. The way to shooting scenes under the mid-day sun is to concentrate on differentiation of brilliance as opposed to differentiating shades this implies the daytime is incredible for catching pictures that you later change over to high contrast. The daytime daylight has a propensity of creating cruel shadows, so its an extraordinary time to catch some solid complexity the key is to think in black and white.