

Are you ready to reclaim your freedom by investing in an indoor mobility scooter? First, you’ll have to make a few adjustments to your interior design. Bringing a scooter home for the first time might seem intimidating, but a little preparation can go a long way. Take a tour through your house from the perspective of a mobility scooter rider to avoid surprises.
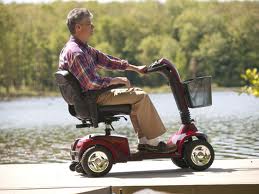
First, you have to start with the right equipment. Those large four-wheel scooters are not very good for indoor use because of their 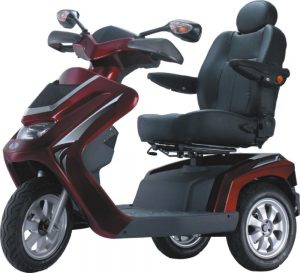

Structural Changes to Consider
How do you plan to get your scooter in and out of the house? Even if you plan to use your scooter indoors only, there are bound to be times when you’ll want to take it to a friend or family member’s house or out in the garden or even to the mall. At the very least, you’ll have to take the machine in for maintenance at some time. A scooter cannot stay confined indoors all the time, no matter how hard you try to avoid lugging it around.
If you live in a home with a flat entryway, you’re in luck. Stairs are much more difficult to accommodate. Modular ramps are appropriate for short patios and porches, but taller entrances will require a vertical platform lift of some sort. Self-contained platform lifts operate much like miniature elevators. Incline style platform lifts work just like chair lifts, anchored to your stairs. Consult with your local mobility supplies provider to find out which option is right for your accessible entrance.
Are your doorways wide enough to accommodate the scooter and any attachments like armrests or saddlebags? Installing thinner doorjambs might be a cost-effective way to reclaim a few inches. Otherwise, widening the doorways is extremely expensive and we would suggest looking for the travel version of the three-wheeled indoor models we mentioned at the beginning of this guide.
Setting the Stage for Mobility
Now that you know you can get into your home, and around inside your home, the next step is to tidy up all those loose ends and remove potential obstacles before they can become a problem. Rearrange furniture to provide plenty of clearance – you may choose to move them closer together once you get more practice maneuvering your scooter, but during the learning stage you’ll definitely appreciate the extra space to roam.
Avoid throw rugs anywhere you plan to drive your scooter. Rugs tend to slip, fold, and sometimes wind up in the wheels of mobility scooters. You’ll be able to navigate much easier without throw rugs in your way. Take some time to rearrange appliances and lighting fixtures to eliminate cords that cross the carpet. Consider installing crank handles on your windows to make them easier to adjust from a seated position.
Your home will be ready for your new scooter in no time at all. You know your accessibility needs, and you know your home – you’ll learn new ways to improve accessibility and the flow of traffic every day. The scooter-friendliness of your home can have just as much of an impact as your choice of scooter. A few pieces of adaptive equipment and weekend of rearranging is all you need.
Natalie Sage is a freelance article writer that blog contributor! Natalie focuses on medical, health and self-development related topics to help keep everyone focused on maintaining a healthy lifestyle.