


A fresh coat of paint can do wonders for a wood-sided house, but, it’s what’s underneath the paint that can really count. Doing the right preparation work beforehand will not only make your paint job last longer, but it will look better too. Doing the prep work properly makes all the difference in how your paint job comes out.
Check The Weather Forecast:
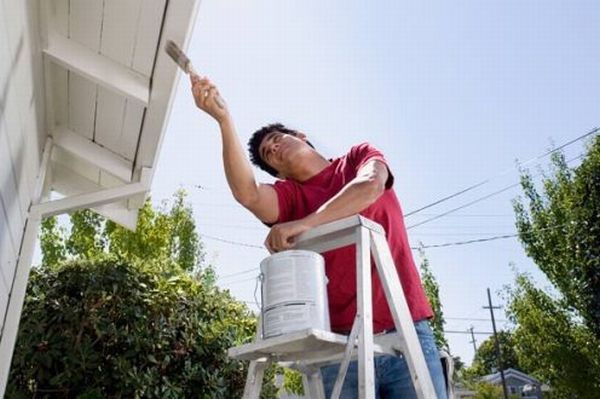
Before you start your painting project, check the weather forecast. Prep work may take less than a day to complete, but, make sure you can finish it before it starts raining. The prep process can be separated into five main steps: Scraping, cleaning, patching, masking, and priming. You can find all the steps for this project and our printable instructions, available at Lowe’s dot com slash articles. Alright, let’s talk safety first. Now you might have to work on a ladder to paint your house. If that doesn’t sound like something you want to do, call a professional for help. Also, older homes built before 1978 might’ve been painted with lead-based paint. If that’s the case it’s best to wear a dust mask for your protection.
Preparation:
Let’s start the prep with scraping. To do that, you might need the following: A ladder, a scraper, a putty knife, a wire brush, a drill with a brush attachment, some paint remover, coarse and fine grit sandpaper, protective gloves, a dust mask, and safety glasses. Now start removing the old paint with a putty knife or scraper, and you don’t have to remove all the paint down to the existing siding. Just the loose chips, and chipped and cracked surfaces. Now, if you paint over these areas without scraping, the new coat will flake off. Alright, once the loose paint has been removed, sand the edges smooth. Ask a Lowe’s associate for the right sandpaper for your job. Now remember to get in those tight spaces around trim and windows. Just use a putty knife to remove any paint chips and old caulk. Now glossy surfaces should be sanded before painted to give the new coat of primer, or paint, a good, sound surface to adhere to.
Painting On Mental:
Now for painting metal, it might be easier to use a drill with a wire brush attachment. Or paint remover. Oh, and don’t use a wire brush and drill on wood because you could damage the surface. Once the exterior’s been scraped, it’s time to clean it. Removing dirt will help the paint stick better. Now for this step you might need: A hose and brush attachment, trisodium phosphate, scrubbing brushes, a broom and a paint brush to remove dust, and safety goggles and rubber gloves. First, remove any loose dust or debris with a broom or a paint brush. Next, scrub the siding with a cleaning brush, warm water, and TSP, following the package instructions. And rinse thoroughly. Now be careful around electrical outlets, and if you see any mildew, mold, or algae, it should be removed.
after you’ve given the siding a good wash, let it dry thoroughly. Then, patch any holes or cracks. Now to complete this step, you might need: some wood filler, a putty knife, exterior spackling compound, a caulking gun, and caulk. Now after you scrape, the chipped paint can leave an uneven surface, especially if you’re dealing with many layers.
Use a spackling compound to even it out. Just apply it with a putty knife, let it dry, then sand flush with the old paint. Now severely damaged or deteriorated siding can be replaced, but if you come across any holes or cracks, they can be repaired. Remove as much dust or dirt as possible, then fill with wood filler. When it’s dry, sand it smooth.
Windows and Trims:
Make sure the surface is clean and dry, and then apply new caulk along the seams. A good rule is to apply caulk anywhere water can enter the home. Now after the patching compound and caulk have cured, we can start masking. And for that you’ll need the following: plastic sheeting, or masking paper, painter’s tape, a utility knife, plastic bags, and drop cloths. Masking is really simple. Just cover the areas you don’t want painted like windows and doors. Hold the paper in place with tape, and then cut it to fit. Use additional tape to seal any loose edges.
Smaller elements, like outlets, lights, and spigots, can be covered with a plastic bag and taped. Now after you’re finished masking, you’re ready to prime the surface.
Priming:
For priming, you’ll need the following: Exterior primer, rollers, covers, brushes, and paint trays. Apply primer with a brush, or with a roller. Now primer, gives paint a better surface to adhere to. And you don’t have to prime everything, but, there are some areas you definitely have to cover. New wood, or where the original surface has been exposed, any patched areas, and any exposed nail and screw heads. Now once the primer is dry, you’re ready to paint. Prepping the surface properly will make your paint job look better and last longer.
Stuart runs bembuilders.co.uk and offer professional painting, decorating and building services in hastings, England.